Image Shadow: Curve-balls
I take a lot of photos and I edit them afterwards. Lately I've been wondering how basic photo editing operations like contrast, saturation, shadows, etc. actually work.
In this post I define investigate how to raise the "shadows" of an image. I'll walk through some programming approaches how to adjust shadows with all the trade-offs.
WDYM "shadow" of an image?
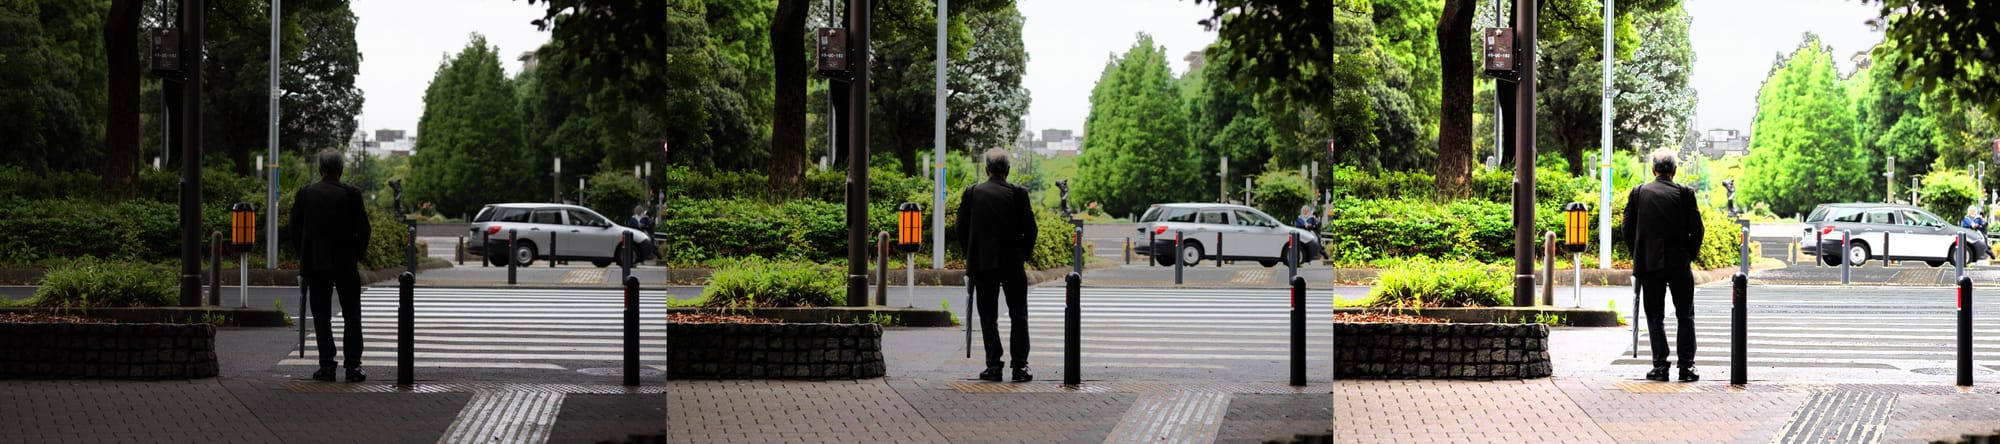
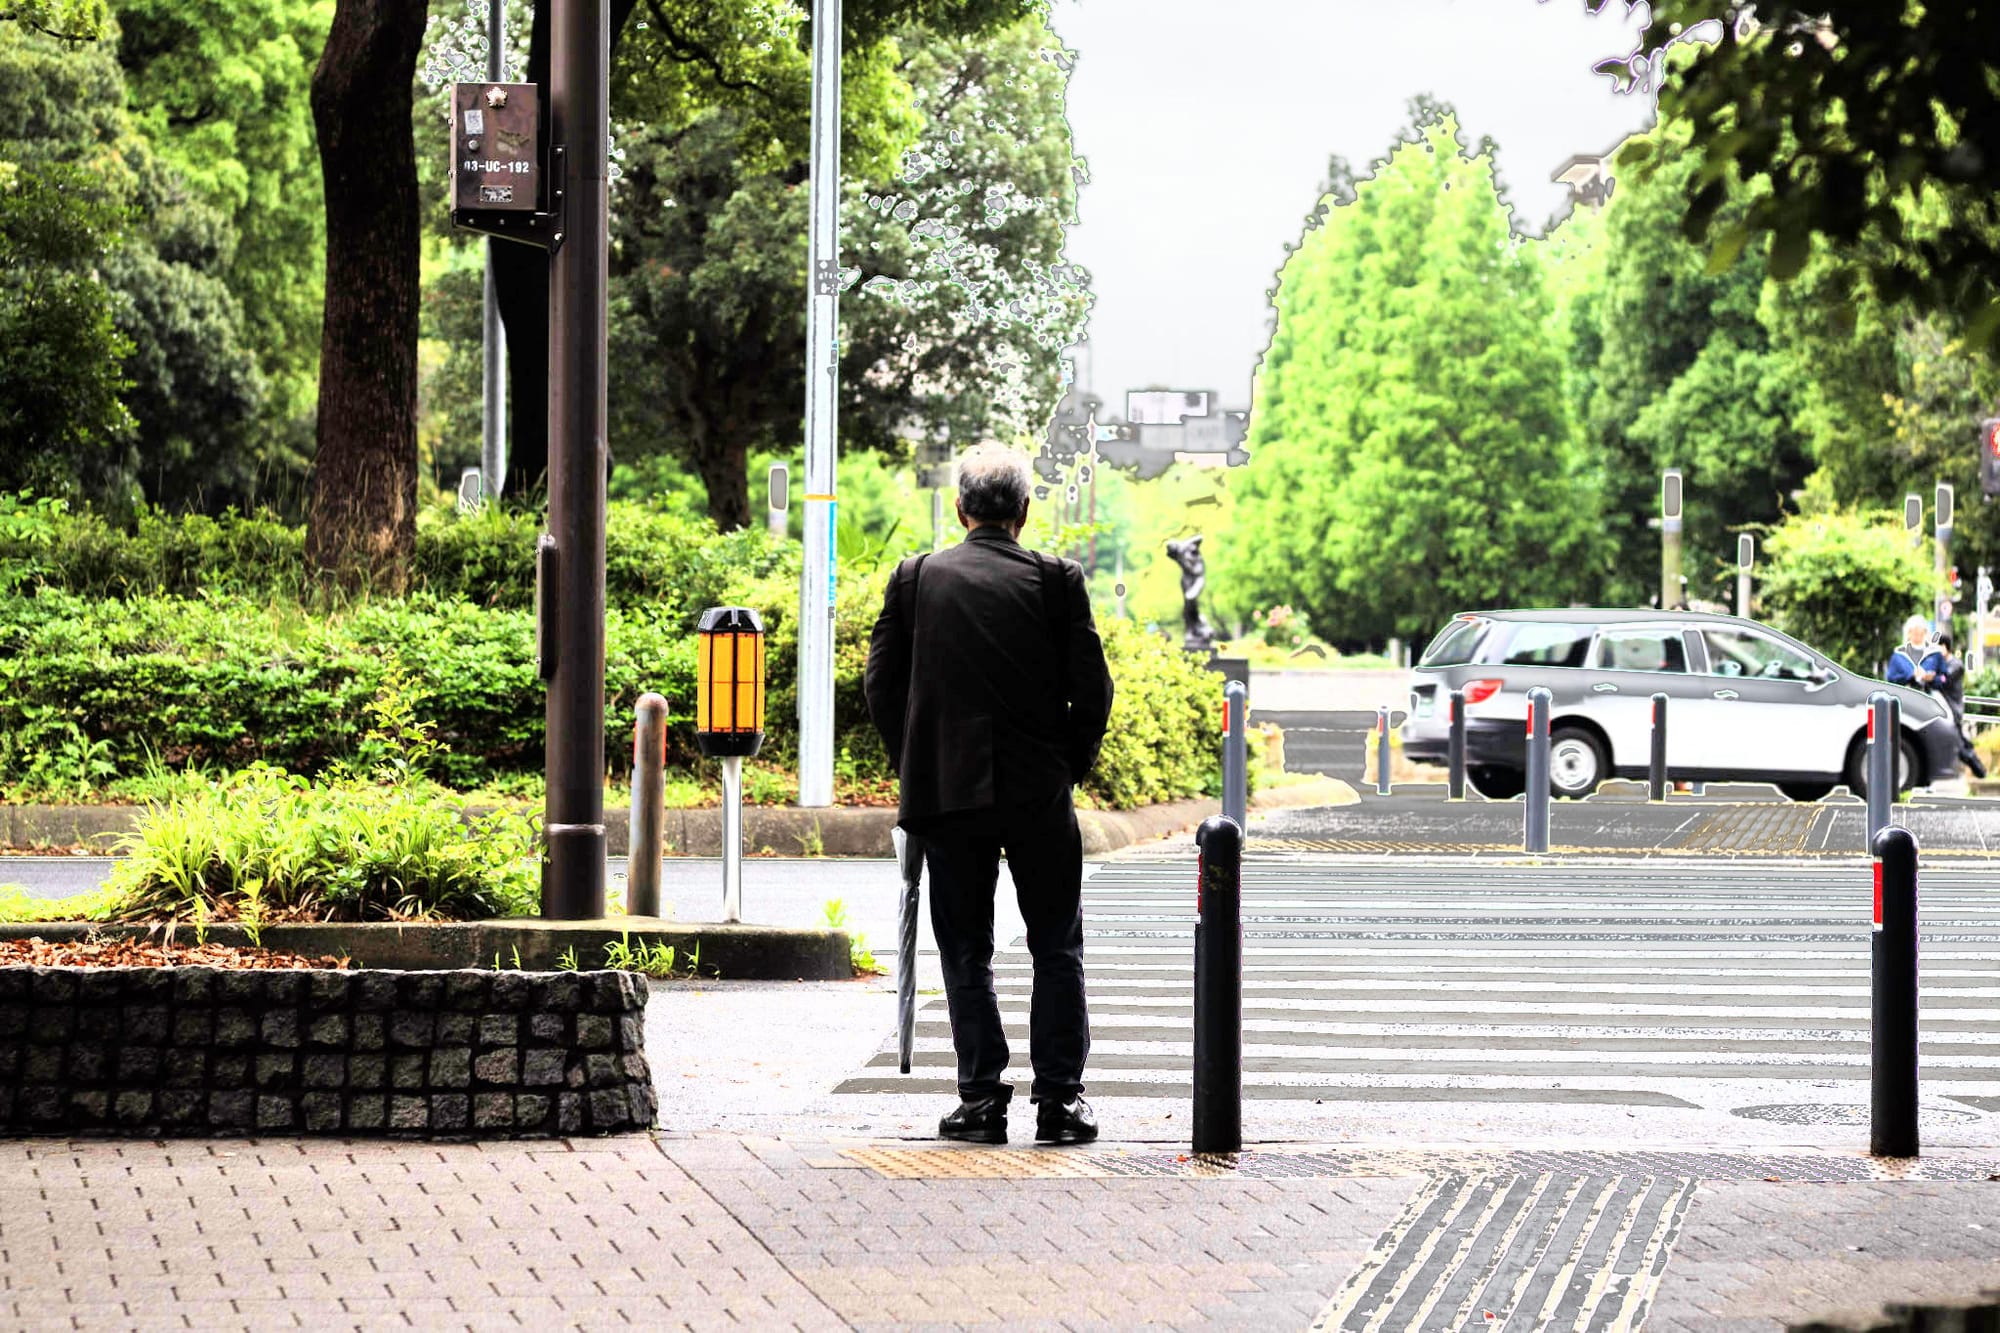
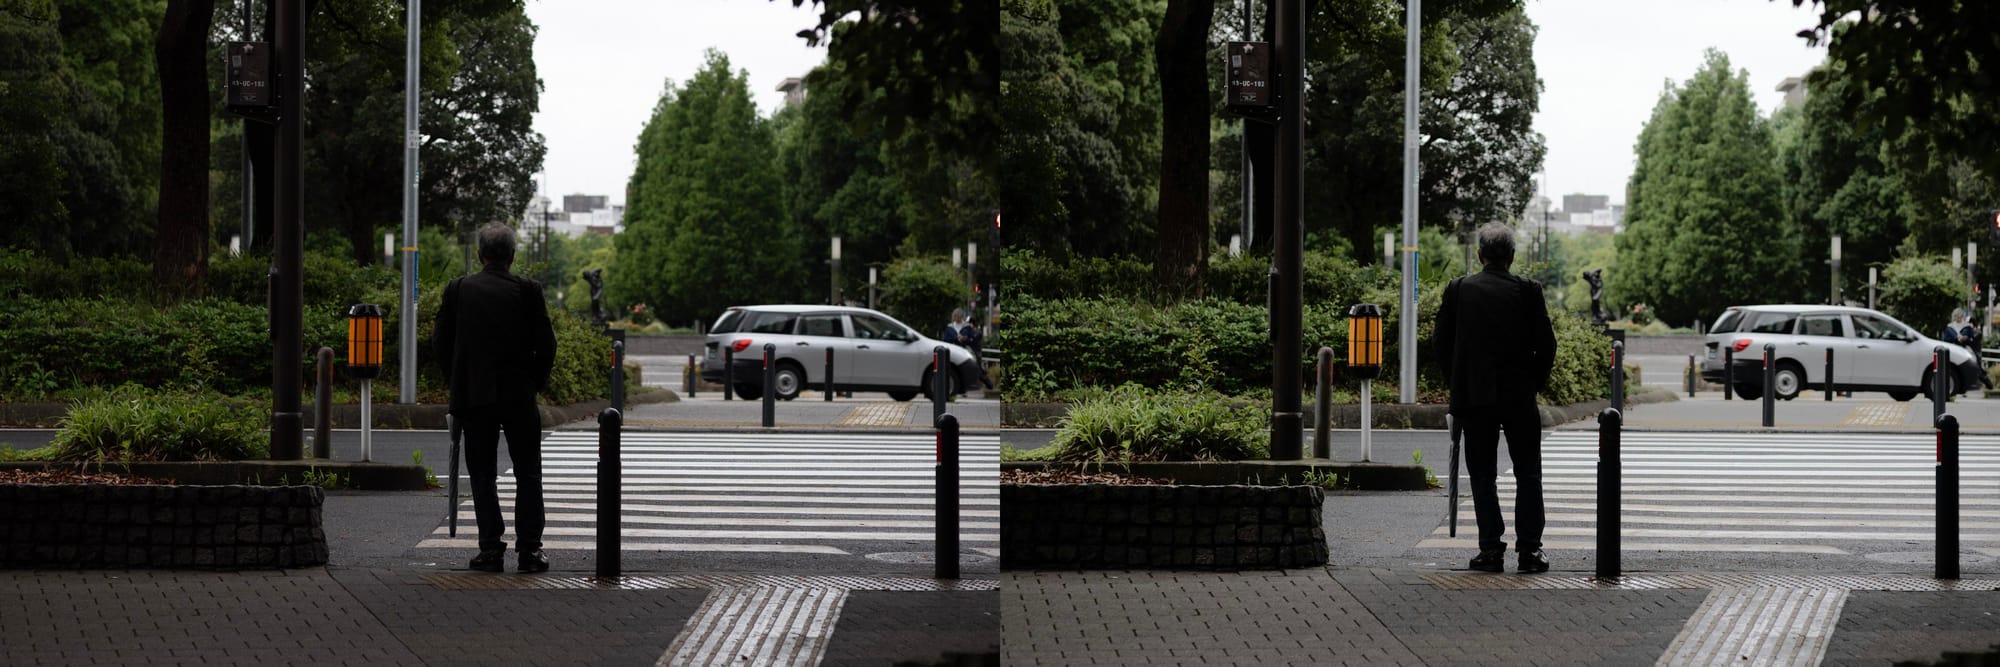
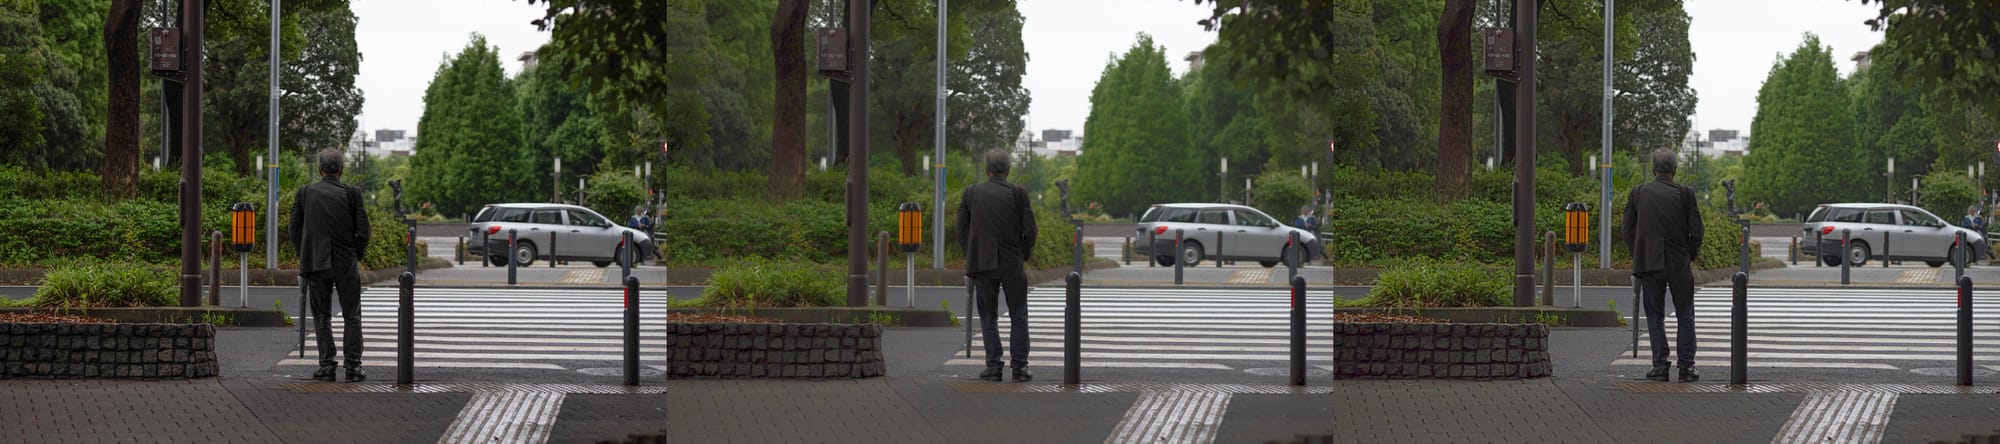
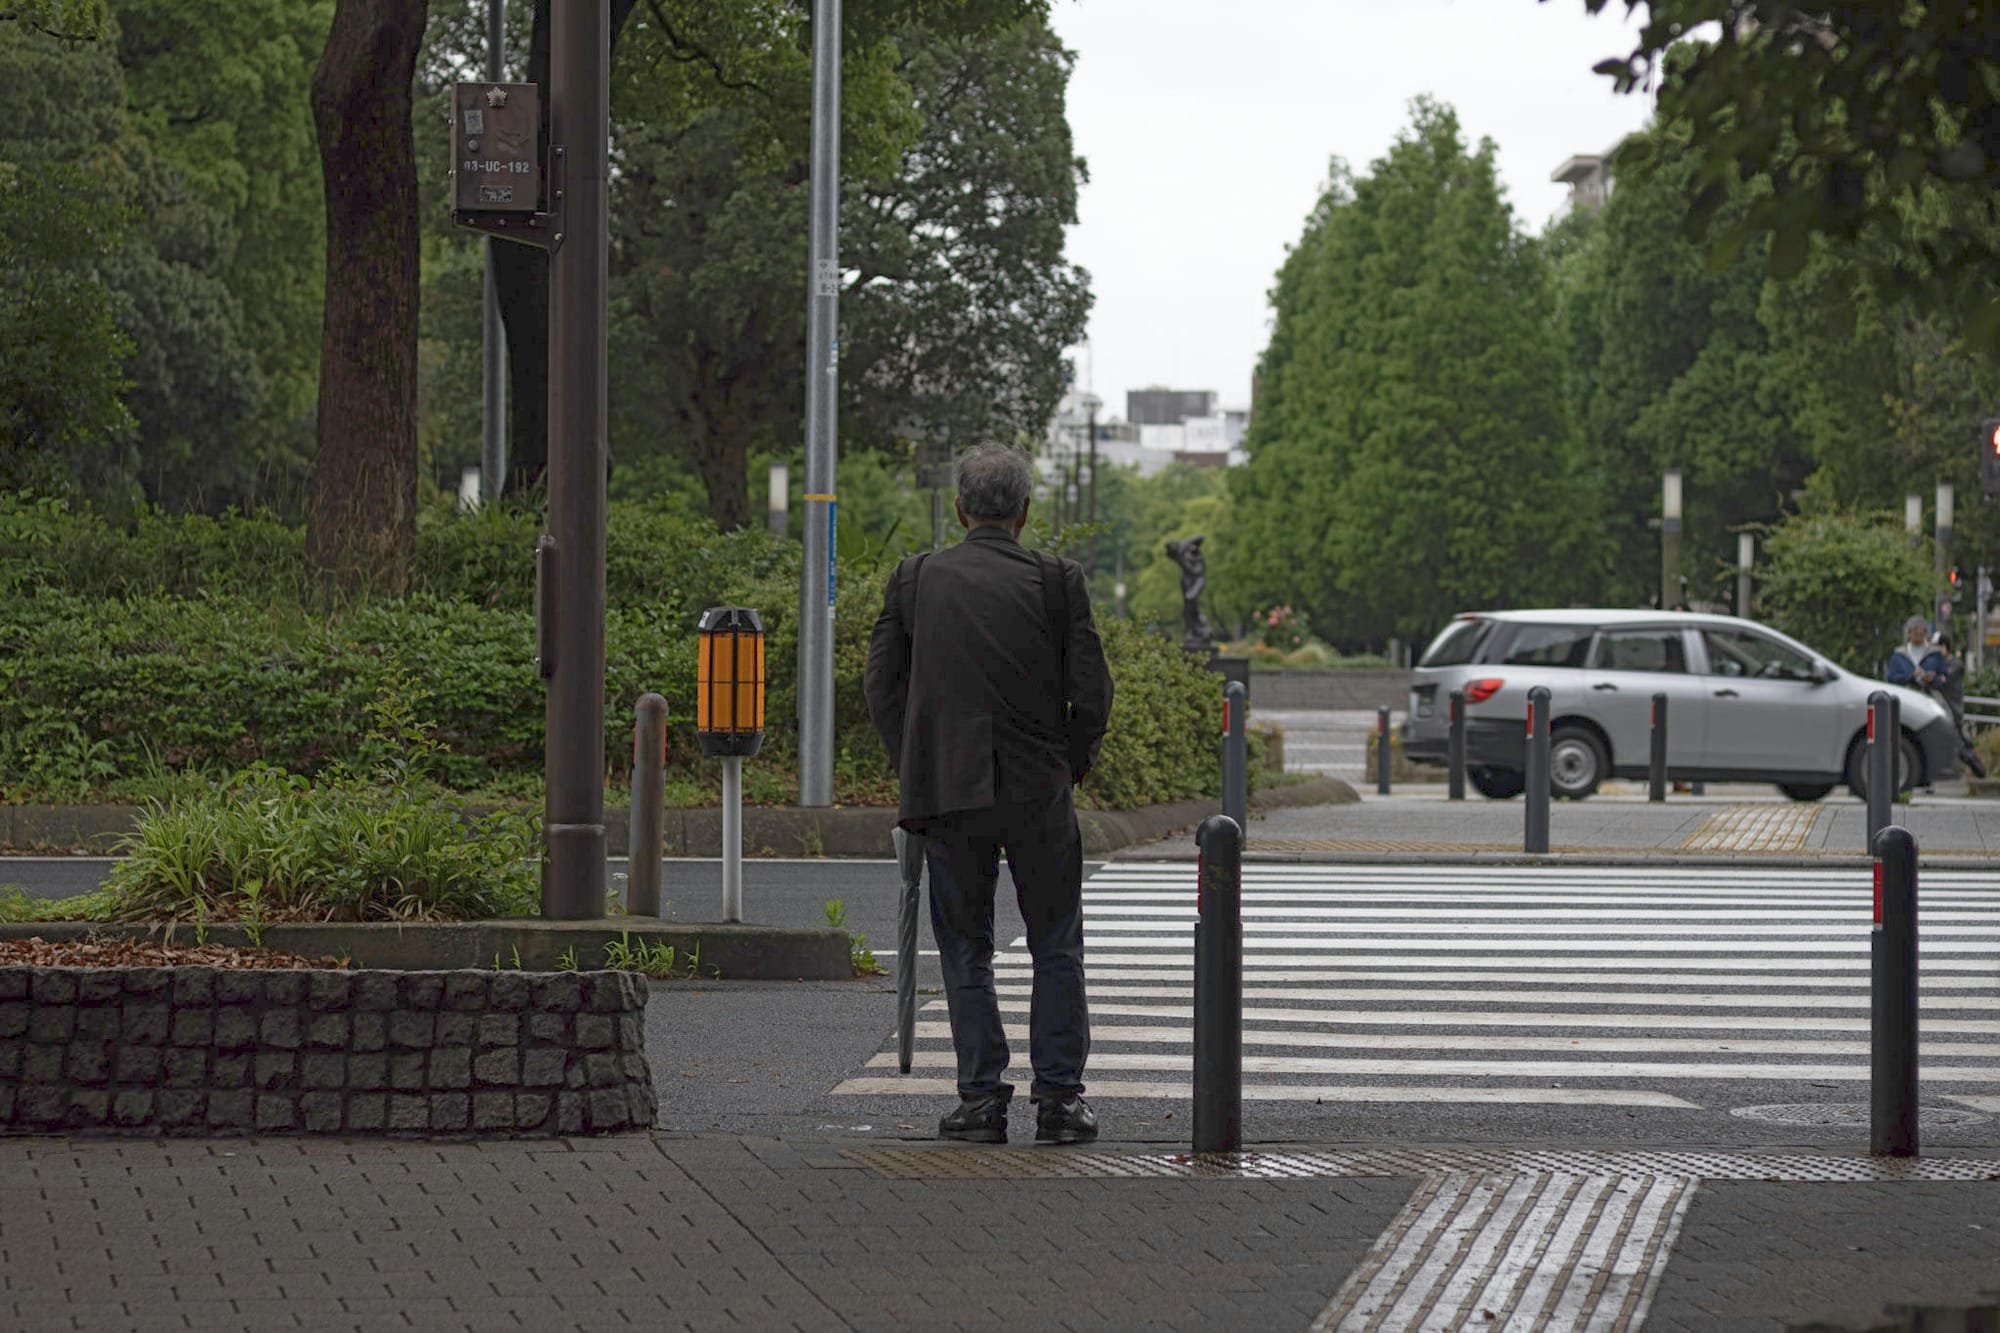
Here's a before/after of an image with the shadows raised using Adobe Lightroom:
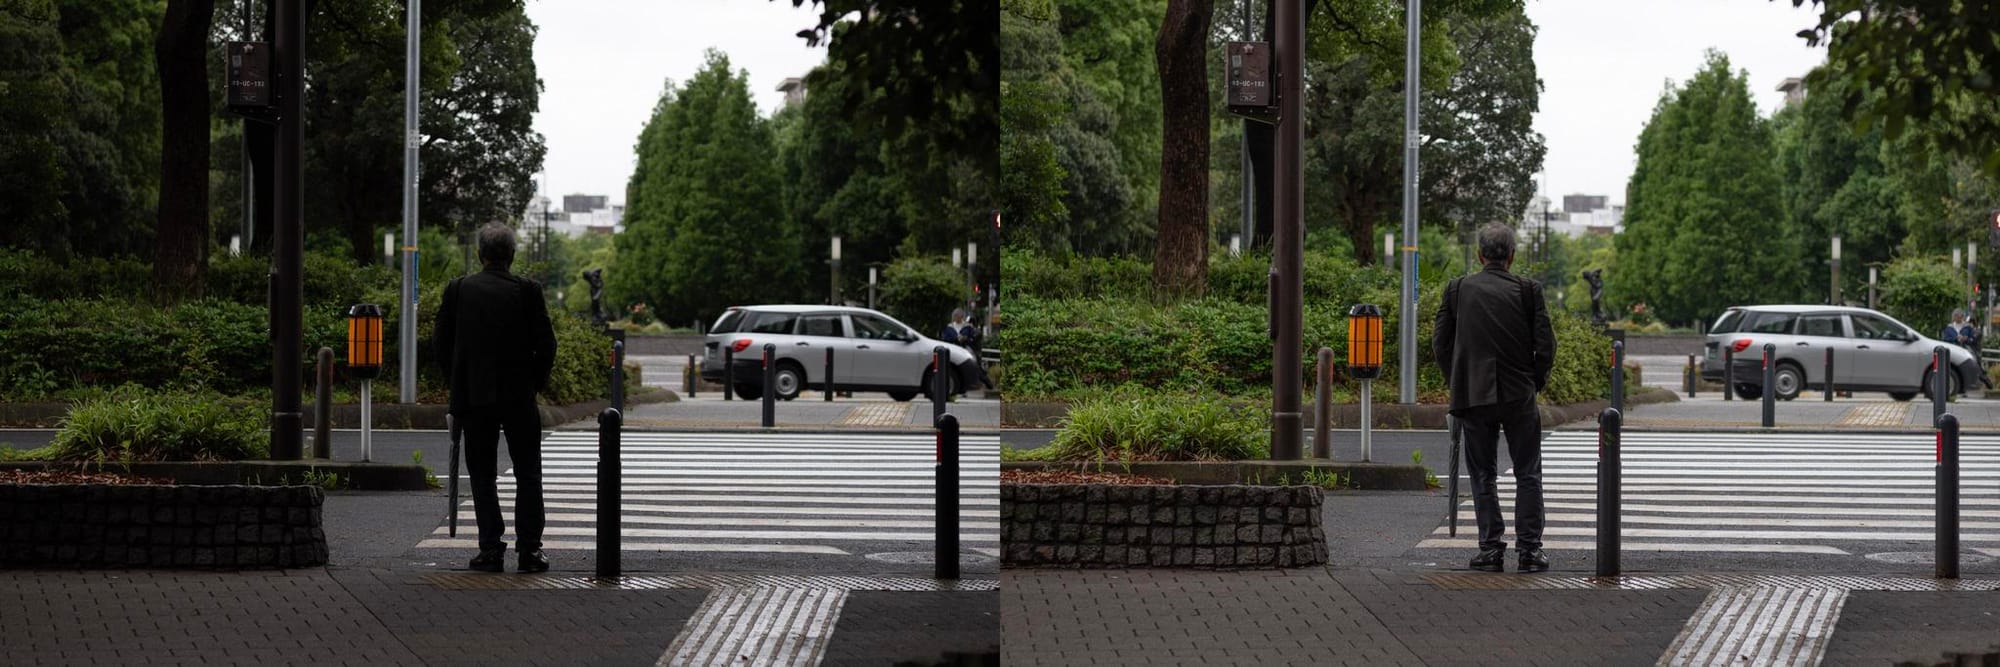
When adjusting the "shadows" of an image, we're really trying to bump up the tones on the lower end of the spectrum between the darks and midtones.
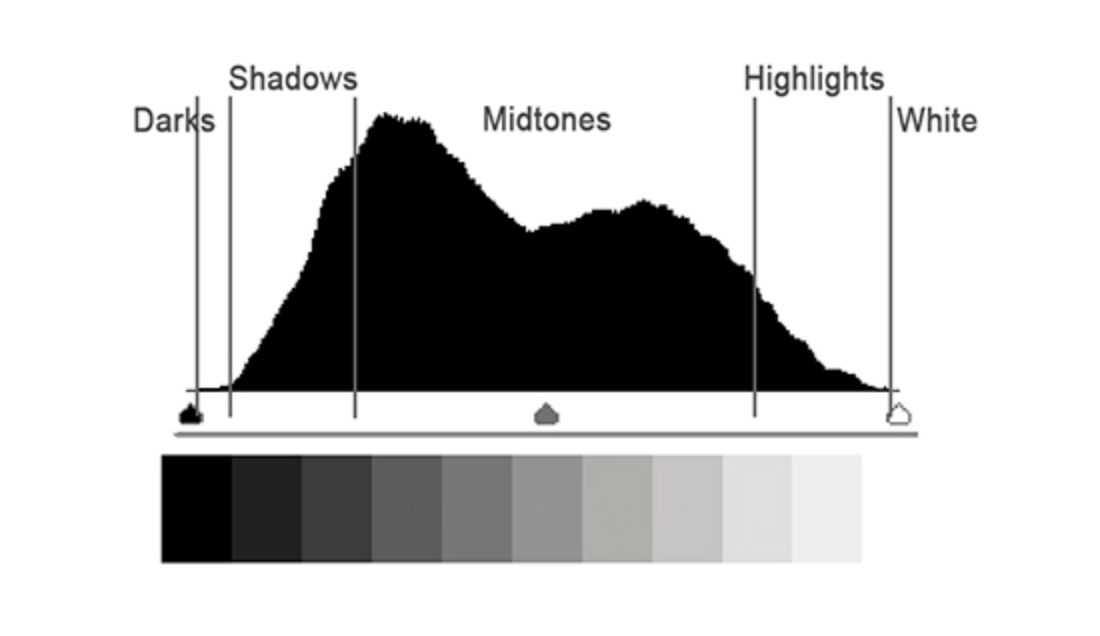
We can use LUMINANCE is a weighted average of RGB values to determine "tone" or brightness.
L = 0.2126 * R + 0.7152 * G + 0.0722 * B
(Luminance is between 0 and 1)
Attempt #1: Hard threshold
The most naive approach would be to adjust the luminance values only within shadow luminance range without any smoothing. Here's what some pseudo code might look like:
if (luminance > 0.1 && luminance <= 0.4) {
  # increase the luminance in the shadow range
  r_new = amount * r
  g_new = amount * g
  b_new = amount * b
}
❌ this does brighten the shadows, but results in harsh boundary clipping at the threshold edges (e.g., 0.1 and 0.4). You'll notice visible breaks in the tonal gradient.
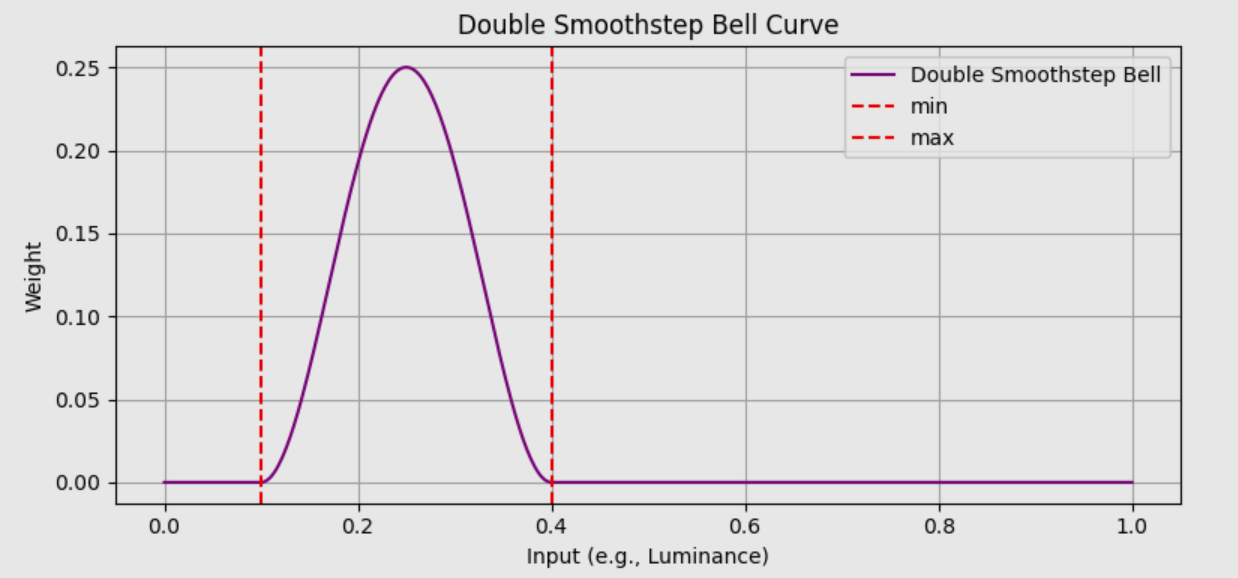
Attempt #2: Smooth Blending with a Bell Curve
To solve the boundary clipping at the threshold boundaries, adjusting the shadows with a bell-curve instead should help smooth out the transition.
Pseudo-code:
if (luminance > 0.1 && luminance <= 0.5) {
  # increase the luminance in the shadow range
  r_new = amount * weighted_curve(L) * r
  g_new = amount * weighted_curve(L) * g
  b_new = amount * weighted_curve(L) * b
}
Using a weighted curve does raise the shadows of the image with less clipping, but there's a flaw this approach:
✅ threshold edges are better (kinda)
❌ darker regions of the image may end up brighter than lighter ones, resulting in an unnatural reversal of contrast.
Pixels that were originally in deep shadow can become brighter than nearby midtones, creating unnatural halos or flattening the depth of the image. Said another way: tonal order is not preserved.
💡New requirement: raising the shadows must preserve the tonal order.
If two values start withx₁ < x₂, then after adjustment, their output should still follow:f(x₁) < f(x₂)
In mathematics terms, this is called monotonicity.
Attempt #3: Preserving tone order
Our goal for raising the shadows is now:
- boost the brightness of pixels within the shadow range
- have smooth blending between at the boundaries of shadow range
- ensure that tonal order is maintained
The solution is to have a target tone line that we use as a reference or anchor for our adjustments. The easiest way to do this is with a tone curve, specifically a gamma curve.
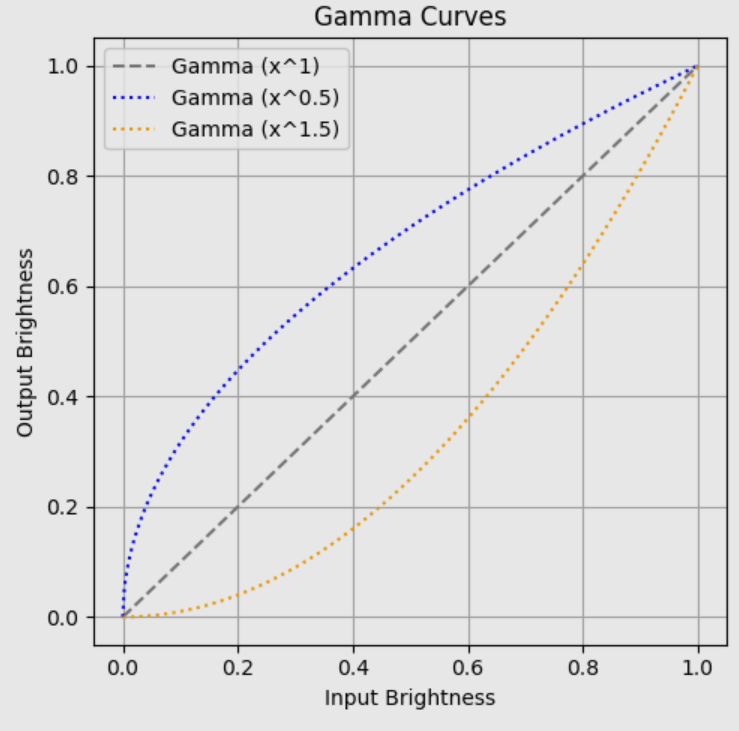
📈 What’s a Gamma Curve?
Gamma curves are widely used in image encoding, tone mapping, and display correction. For our purposes, a gamma curve defines an ideal, perceptually-correct brightness for a given input.
Gamma is an exponent (γ) used to map linear brightness values to nonlinear ones — and vice versa — to match human perception or display behavior.The equation for a gamma curve is simple:
y=x^γ
| γ | Effect |
|---|
| 1.0 | Linear (no change) |
| < 1.0 | Lifts shadows (brightens) |
| > 1.0 | Darkens shadows (more contrast) |
When γ < 1, the curve lifts the shadows while keeping the highlights mostly unchanged.
Adjusting shadows with a target curve
Our shadow equation becomes:
output = x + amount* bell_curve(x) * (gamma_curve(x) - x)x= original pixel brightness (linear or gamma-encoded)- gamma_curve
(x)= your tone curve (e.g., gamma 0.6) - bell_curve
(x)= how much you want to apply the effect strength= global multiplier
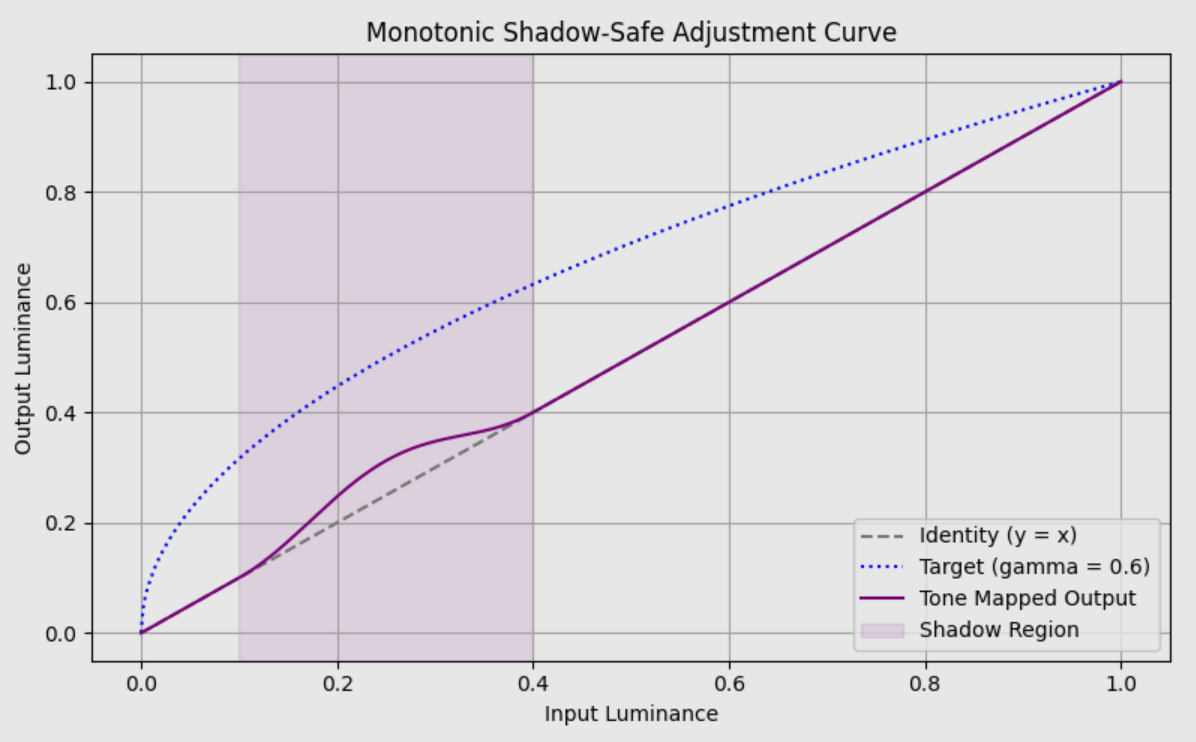
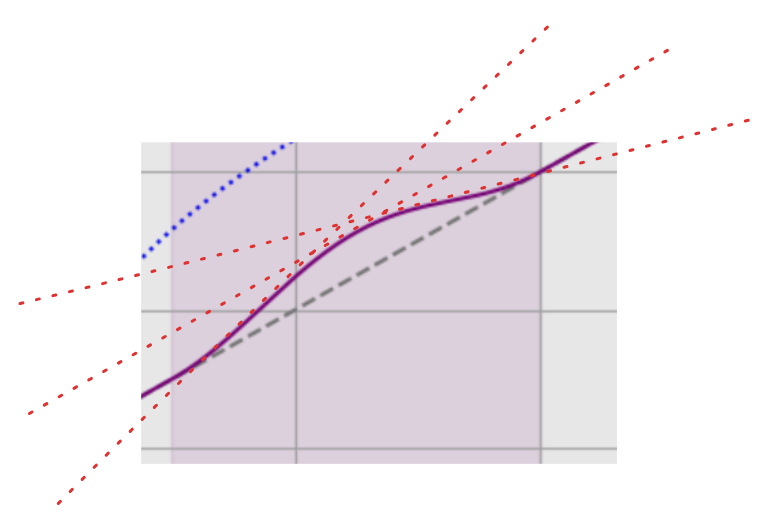
We can look at the shadow region and see that the tonal order is preserved. Or in mathematical terms, the slope is always greater than zero:
Here's the Jupyter code for the graph ⬇️
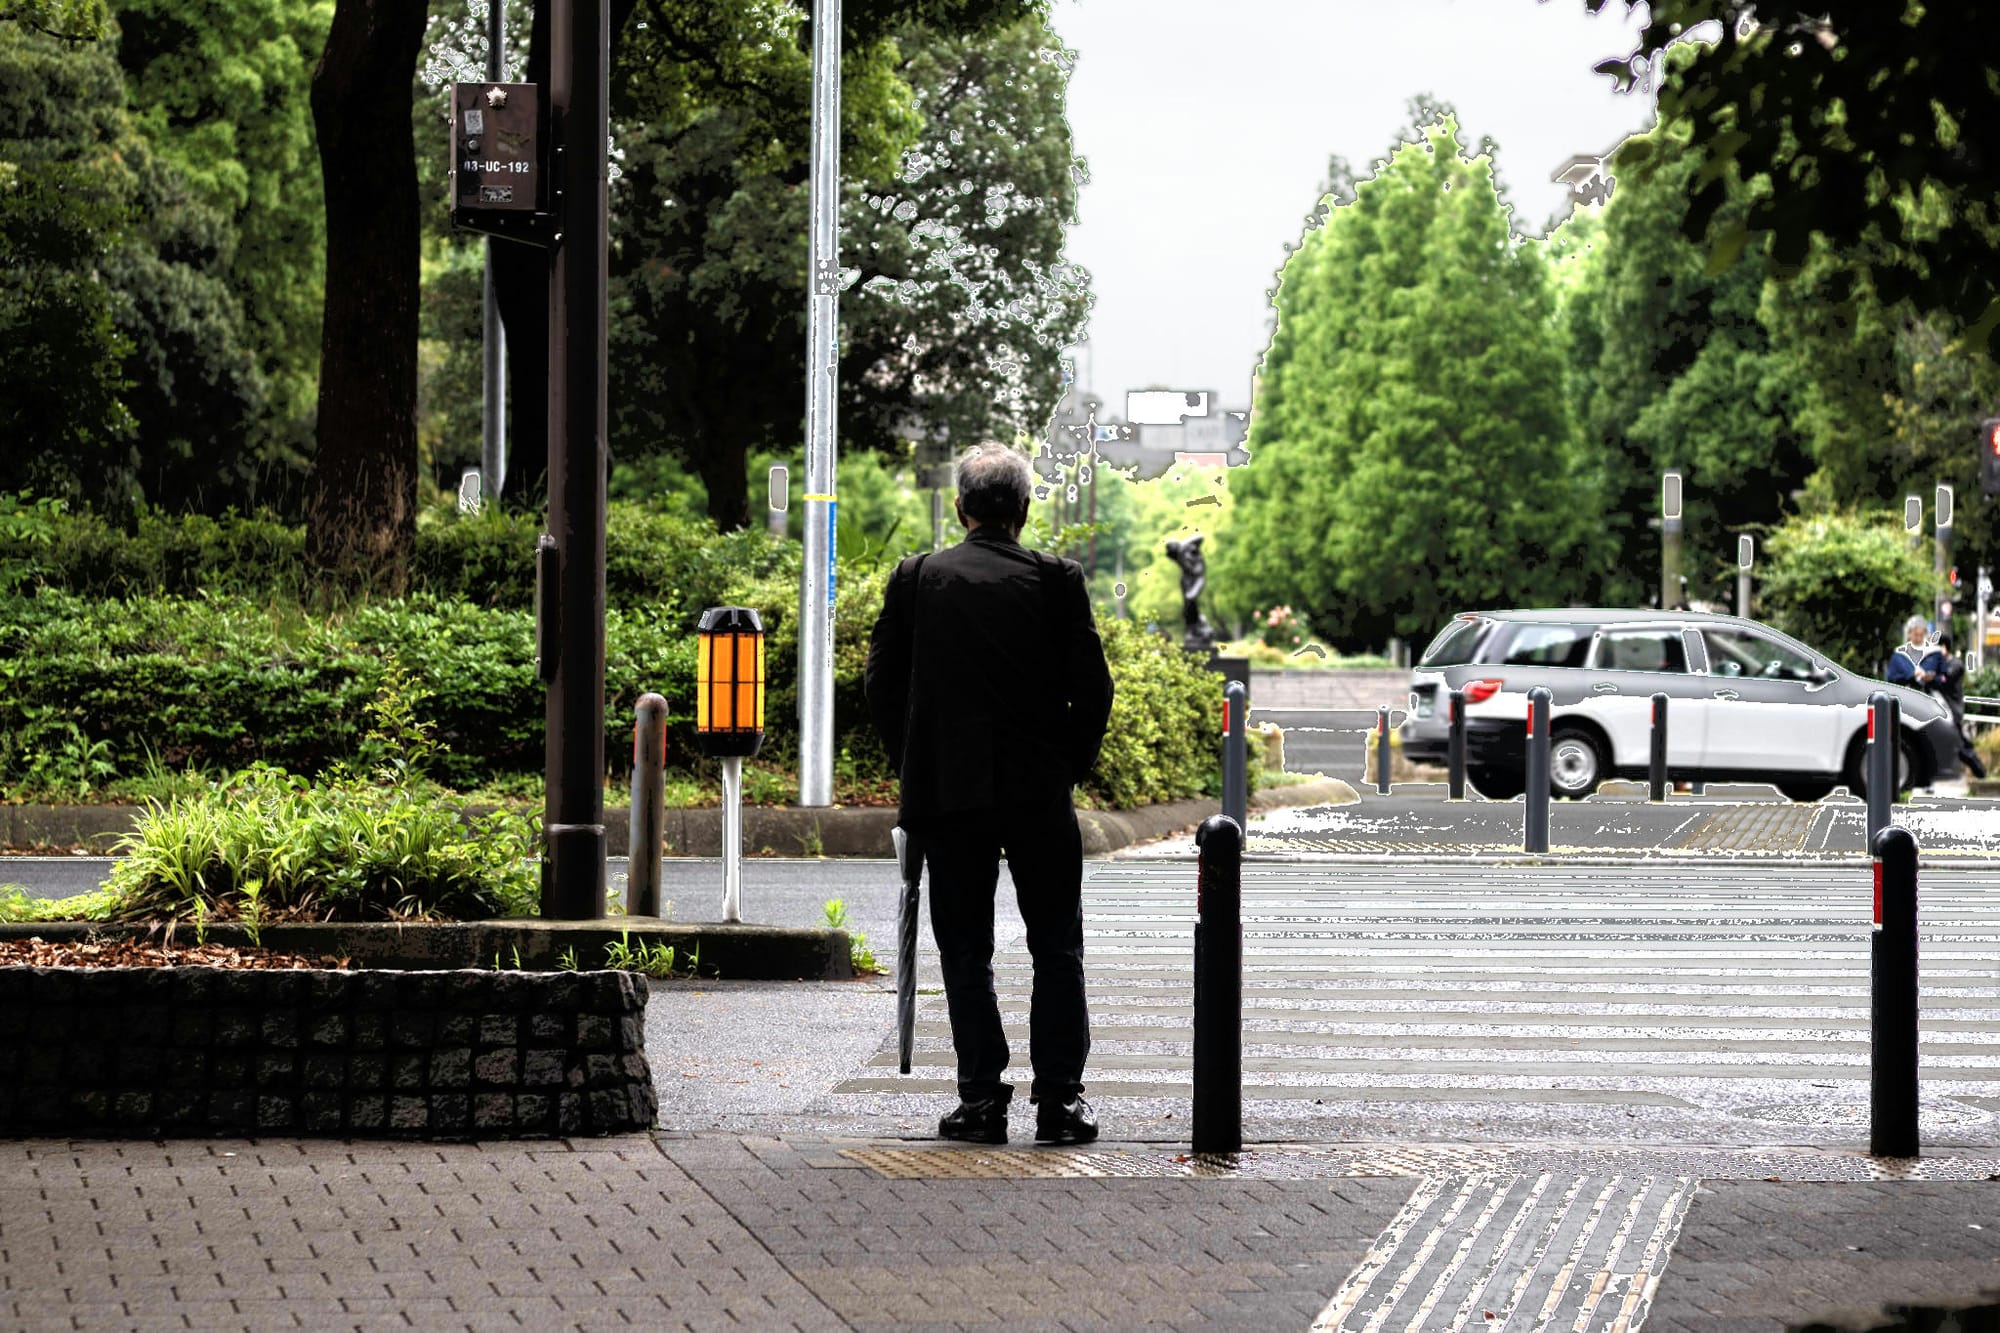
Final image results:
✅ This result is an improvement now that we're able to maintain tone order.
❌ The color has changed; the final image is de-saturated compared to the original
❌ There's considerable grey clipping in the trees
Attempt #4: ...
At this point I was ready to throw in the towel, but
Bonus Attempt #5: Slow but better details
My research lead me down one more path that was better at preserving contrast and fine details: a bilateral filter for shadow lifting.
This approach is more computationally intensive and thus much slower.
The bilateral filter approach is particularly effective for shadow lifting because it can separate large-scale illumination changes from fine details, allowing you to boost shadows without amplifying noise or losing texture information.
- Claude.ai
There's a whole wiki article on bilateral filters, but the TLDR is that a bilateral filter considers both spatial distance and intensity similarity.
We can calculate a weight that is a combination of both: weight = spatial_weight × range_weight
The details of the implementation are quite intense. It's a bunch of matrix logic, but the results are impressive. I leave it to you to generate the code with AI tools, but here's the result:
The contrast and edges are much better preserved. This is the closest to Lightroom quality that I was able to achieve. Unfortunately, it's quite a slow calculation.
Conclusion
When I first tried to understand how "shadow" adjustment works, I found very little clear guidance. Different approaches used various tone curves, masks, and blending models — some even considered neighboring pixels.
The gamma-target approach described here struck a good balance between simplicity, control, and perceptual correctness. It avoids tonal inversion and creates a more natural look.
Bilateral filters are cool, but slow. There are obviously ways to optimize and it would be interesting to see how far one could take it.
Whatever Lightroom is doing under the hood, it’s probably more refined and adaptive — but this is a solid starting point for understanding and building your own tone mapping tools.